Showing posts with label recipes. Show all posts

Saturday, May 24, 2014

Great-Grandma Sarah's German Honey Cake


I have a recipe box that has a few family recipes in it. I've tried a handful so far, including yeast raised overnight waffles (which I will have to share because they ROCK.) But this time I'm going to share my great grandmothers recipe for German Honey Cake. Despite being called honey cake, it's not very sweet, but is great for breakfast with coffee. The raisins add to the sweetness, so don't leave them out, and make sure you toast the walnuts!

By the way, my great grandma Sarah crocheted the doily pictured here too. I keep it on my coffee table. She taught my mom how to crochet, and I would like to say my mom taught me, but really YouTube taught me. I know my mom showed me how to knit and crochet as a child but I forgot all of it and didn't decide to try to learn until I was in living in Guam. 


Ingredients (makes two 8x8 or one 9x12 cakes)
2 Eggs
2 1/2 Cups Flour
3/4 Cup Honey
1 Cup Oil
1 Cup Coffee
3/4 Cup Chopped Walnuts
1 tsp Baking Soda
1 tsp Baking Powder
1 Tbsp Cinnamon
1/4 Cup Orange Juice
1 Tbsp Lemon Juice
3/4 Cup Raisins

Mix all together. Beat at medium speed for five minutes. Pour into two 8x8 or one 9x12 pan. Bake at 350 degrees F for 40 minutes.


Wednesday, May 21, 2014

Homemade Dog Treats

I remember the first time I came back to visit New York from Alaska. I was going to be a bridesmaid in my brothers wedding, so I had to wait for nine months to go on leave to see Joe again. I stayed with him in his tiny apartment with him and his dog, Knuckles, for 10 days. In a mission to bake a pumpkin cheesecake we went shopping at a local specialty foods store and found dog bone shaped cookies cutters. I thought it was so cute! I insisted that we make Knuckles some dog treats. That was probably the very first thing we ever baked together. 
Knuckles was such a good boy and I know Joe still misses him terribly. Having our Murray around really makes him happy. Murray is similar to knuckles in a lot of ways. He's well behaved and is very patient. He is also a pro at snuggling! This guy will wait until I get out of bed and then look anxiously at Joe until he invites him up. Then he hops on the bed and puts his big head right up next to Joe's face or on his chest. So cute! This silly boy deserves some treats of his own!
Unfortunately the adorable dog bone cookie cutter is packed away with Joes stuff in New York, so I had to use a boring old jar ring to cut them. It was either that or have christmas stocking shaped treats since the only other cookie cutters I have are from when we made christmas cookies. I want to pick up some letter stamps too, so I can stamp his name on each one, but instead I had to make sad little "M" shapes with a butter knife. It seems like my creations always look better in my head... Murray couldn't care less of course, he just wants to eat them. I'm a little weird when it comes to baking and cooking, I get so worried about things getting stale or having a weird texture... then I remember that Murray licks his own butt. So yeah. There is that.
What I'm trying to say is don't worry too much about how they turn out! Get creative with it and add pumpkin instead of peanut butter or add chopped up bacon bits or beef jerky. I plan on trying out a bacon variation soon!

I adapted this recipe from Food 52.


Murray's Dog Treats

Ingredients:
1/2 Cup Peanut Butter
1 Cup Water or Beef/Chicken Broth
2 Tbsp Vegetable Oil or Bacon Grease
1 1/2 Cup Whole Wheat Flour
1/2 Cup All Purpose Flour
1/2 Cup Rolled Oats

Preheat Oven to 350 degrees F.

Combine peanut butter, oil, and water in a bowl. Add whole wheat flour and oats and mix until smooth. Turn out onto a surface with the remaining all purpose flour and knead until the rest of the flour is absorbed and you have a firm dough. 
Roll out with a rolling pin and cut into shapes. Place treats on a cookie sheet covered in parchment paper and bake for 15 minutes. You may have to bake for less time if you make smaller treats, but Murray is a big boy so we make big ones for him.


My very sad little "M" shapes... *sigh*

Wednesday, May 14, 2014

Fish Tacos with Mango Salsa

About a week ago my mother mentioned to me that she had never had a fish taco before. I couldn't believe it! 
I never really had a steadfast recipe for fish tacos before, so this time I decided to write it down and share it. If you are sensitive to spicy food I highly recommend using jalapenos instead of serrano peppers for the salsa. The jalapenos at the store looked mushy so I went for serranos instead. Little did I know, they are HOT! It's a good thing I didn't try for the pretty orange habaneros! 


Fish Tacos with Mango Salsa (serves 3)

For the Fish:
1 lbs Tilapia (or 3 fillets)
1 tsp Salt
1 tsp Smoked paprika
1/2 tsp Chipotle chili powder
2 tsp Garlic pepper
Olive oil

For the Coleslaw:
1/2 Red cabbage, sliced
1/4 Cup Greek yogurt
1/4 Cup Mayonnaise
Juice of one lime
1/4 tsp Smoked paprika
1/2 tsp Mexican seasoning (McCormick brand)

For the Salsa:
4 Roma tomatoes
2 Small or 1 large avocado(s)
2 or 3 Radishes
1 Mango
Juice of 1 lime
2 Serrano peppers
Salt to taste

Don't forget the soft taco tortillas!


To Prepare the Fish:
Rinse and pat the fillets dry. Lightly coat each one with olive oil on both sides. Combine all the the spices together and rub onto each fillet. Cover and store them in the refrigerator while you prepare the salsa and cole slaw.

To Prepare the Salsa:
Core and remove the seeds from each tomato. Dice the tomatoes, avocados, mango and serrano peppers and combine in a bowl. Slice the radishes into rounds and add to the bowl. squeeze in the juice of the lime and salt to taste.

To Prepare the Cole Slaw:
Slice cabbage to make shreds and set aside. Mix mayonnaise, yogurt, paprika, Mexican seasoning and lime juice together to make a sauce and combine with the cabbage. 


Preheat the oven to 425 degrees F.
Place fish fillets on an aluminum foil sheet sprayed with olive oil and bake for 10 to 15 minutes until the fillets turn flaky. 
Warm the tortillas and place coleslaw in the center of each one, followed by the baked fish and topped with the salsa. Enjoy!


Wednesday, May 7, 2014

Red Velvet Sangria

I would love to be the type of blogger who tested and posted recipes in time for the reader so actually try it for the intended holiday! Alas I am not. So it's a good thing that sangria is an excellent summer drink and not just designated for Cinco de Mayo.
I've been wanting to make sangria for a long time (since before I got pregnant) but I never did. It seemed like a waste of wine to use a whole bottle when my husband doesn't drink wine himself. Now that my mom is here helping with baby Ellie I thought it would be a great opportunity!

This sangria is sweet, but not too sweet. I used the Cupcake Vineyard Red Velvet blend, which I think is delicious and used sliced strawberries as the fruit. My husband even tried it and said that he liked it, so I consider this a great success!  


Red Velvet Sangria

1 Bottle of Cupcake Vineyard Red Velvet wine
1/4 Cup lemon juice
1/4 Cup orange juice
1/4 Cup Triple Sec
1/4 Cup sugar dissolved in 1/4 cup warm water to make simple syrup
2 Cups ginger ale
1 Lemon, sliced
1 Lime, sliced
16 oz of strawberries sliced
1 Tangelo, sliced (you can use an orange if you prefer)

Combine the wine, simple syrup, orange juice, lemon juice and Triple Sec in a pitcher. Add strawberries, lemon, lime and tangelo or orange slices. Top it off with ginger ale and stir. Let sit in the refrigerator for a few hours or overnight before serving. Serve with a basil leaf or rosemary sprig as garnish.


Sunday, October 6, 2013

Pumpkin Bread from Roasted Pumpkins

On a late night run to the grocery store for some emergency Ramen noodles, I discovered that they were selling baking pumpkins! I was so excited I bought two. I ended up with a lot of extra puree, which means I'll probably make pumpkin pancakes, soup or something else with it. 

Don't forget to save the seeds and roast them too, with a little salt!


Scoop out all that goop!


I baked the pumpkins at 350 degrees for an hour and a half, cut side down on a baking sheet.


Toast the pumpkin seeds at 350 for maybe 10 minutes? I took them out once I heard them start popping inside the oven and they came out fine. Check them often to make sure you don't burn them.


I pureed it in the blender. Yum! This is a good idea for baby food.


Recipe for Pumpkin Bread comes from The Joy of Cooking. 


Delicious!

Thursday, August 22, 2013

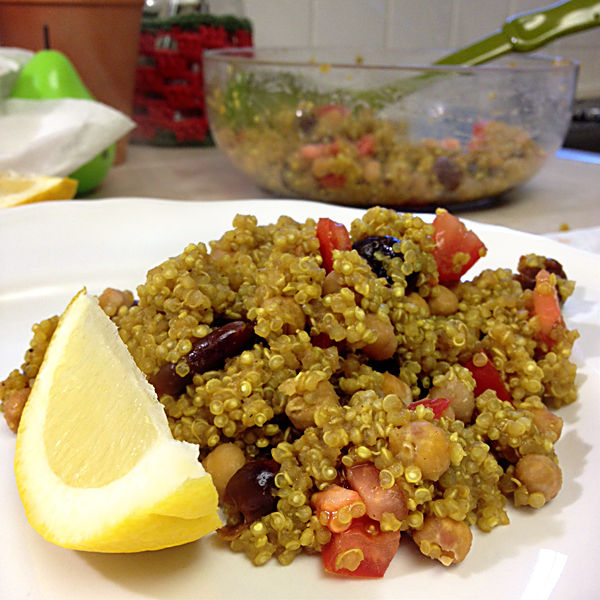
Curried Quinoa with Cherries and Crispy Roasted Chickpeas

Quinoa is one of those perfect side dishes that's easy to make and easy to keep on hand. Not to mention it's healthy!
Since plain quinoa is boring I usually spice it up with curry. You can substitute most of the ingredients here, like replacing the cherries with dried currants or raisins. You can also use green peas instead of chickpeas. I even replace the quinoa with cous cous when I am in a rush to get dinner finished.

I entered this recipe on Food52's Your Best Quinoa Recipe contest. Check it out! I just thought it would be fun to try it out and see what happens.


Ingredients:
1 Cup quinoa
1 1/2 Cups vegetable broth
15 oz Can garbanzo beans
1 Roma tomato, diced
1 Tbsp olive oil
1 tsp salt
1 tsp curry powder
1/4 tsp cumin
1/4 tsp garlic powder
1/8 tsp cinnamon
1/8 tsp cloves
1/4 Cup dried cherries

Soak quinoa in cool water for ten minutes, strain, rinse and let drain for 20 minutes. Toast the quinoa in  a sauce pan to remove excess liquid.
While the quinoa is draining, prepare the garbanzo beans. Preheat the oven to 400. Drain and dry the beans with a paper towel. Spread the beans on a cookie sheet and drizzle on 1 tablespoon olive oil. Coat the beans in the oil by stirring them around the cookie sheet. Sprinkle with salt. Toast in oven for 20 minutes. Remove from oven and set aside.


Mix the curry, cumin, cinnamon, cloves, garlic powder and 1/2 tsp salt together and whisk it in the vegetable broth. Add dried cherries to the broth and bring to a rapid boil.

Add the quinoa to the broth and turn down the heat to a simmer. Cover the saucepan, leaving space for ventilation, and let it simmer until the liquid is gone and the seeds show a white spot in the middle with a ring around them (like Saturn rings) About 20 minutes.
Fluff with a fork and place in a serving bowl. Toss quinoa together with the chickpeas and diced tomato. Enjoy!


This recipe was adapted from two sources, Steamy Kitchen's Crispy Roasted Chickpeas, and Eating Rules Fluffy Quinoa. 

http://www.eatingrules.com/2011/10/how-to-make-fluffy-quinoa/ 
http://www.steamykitchen.com/10725-crispy-roasted-chickpeas-garbanzo-beans.html

Saturday, August 10, 2013

Classic Balsamic Dressing

When I was a kid my Dad always made a salad with dinner. From what I remember, he used red wine vinegar, but of course I seem to love balsamic vinegar, so that is the kind I used for this recipe. This is the type of dressing that can go on any salad and can be kept in the fridge for a long time. It's a nice step up from the plain oil and vinegar dressing that people sometimes use for a regular dinner salad.


Ingredients:
1/2 Cup Balsamic Vinegar
1/4 Cup Olive Oil
1/2 tsp Dijon Mustard
1 Clove Crushed Garlic
Pepper to taste

Mix everything together in a dressing bottle that can be shaken without spilling, shake it up and enjoy! I added mine to a strawberry walnut salad. This makes enough to keep as a table condiment for a long time.


I hope everyone is enjoying the last bit of summer! The Alaskan summer is over and the leaves are already changing. It will be snowing before you know it!

Friday, August 2, 2013

Macarons, Part Two

Aren't French Macarons the cutest thing? I randomly decided to bake a batch late at night to see how they would come out.
I've read quite a few blogs where people have tried baking macarons for the first time and they came out perfect. No such luck for me! I suppose that depends on your definition of perfect... but for me it's been tricky. Once it was too humid and I didn't get the "pied." Another time I didn't fold the batter enough and it was too stiff, resulting in bumpy cookies. 
This time, to combat the humidity, I put on a small fan in their direction after I piped them onto the cookie sheet. I also ran the almond meal through the food processor to make it finer. It worked pretty well and I got the cute little feet on the cookie and the skin came out smooth! I also didn't over-brown them like I have in the past... but they seemed to be undercooked! They were a little too mushy inside. How on earth do you cook them through without browning too much?
But of course, I have never had a real macaron to compare it to... I guess I will have to take a trip to Paris!

macarons, pastry, baking, food

My mom sent me this cookbook as a gift and it has a ton of great ideas for macaron flavors! It has everything from fancy Lavender and Rose Water recipes to Peanut Butter and Jelly flavor. I chose Vanilla just to keep it simple, although I cheated and used leftover cream cheese frosting for filling :-D 
I also used a neon purple food coloring for them which came out looking like a yummy bubblegum pink.

macarons, pastry, baking, food

macarons, pastry, baking, food

macarons, pastry, baking, food

macarons, pastry, baking, food

Sunday, July 28, 2013

Salmon with Balsamic Glaze

One of the best parts of living in Alaska is the free fish! Co-workers and neighbors always go fishing and bring back treats to give away because they have too much to eat themselves. Our neighbors asked us to water the plants while they went on a camping trip and they brought back these beautiful fillets for us (They brought us halibut last time, which was amazing!) 

Since we've had so many salmon fillets I have tried out different methods of cooking them. One of our favorites was salmon ravioli, which was my first try at making pasta from scratch. I'll have to make those again and post the recipe because it was fabulous... But the hands-down best way to eat a salmon fillet is with a balsamic glaze.

I know I got this recipe off of Yummly, but I searched for it and I can't find the source again. I had written it down in my little recipe notebook previously because I liked it so much. I don't want to claim that I came up with this myself, but I would like to share it.

sockeye salmon
Look at these gorgeous Sockeye fillets! I wanted to eat them raw! 
Balsamic Glaze for Salmon
Makes 4 servings

Ingredients:
1/4 cup balsamic vinegar
1/4 cup water
1 1/2 Tbsp lemon juice
4 tsp brown sugar
1 tsp mustard

Whisk all ingredients together in a skillet. Simmer until thickened and reduced to 1/3 of a cup. Spoon over prepared salmon.

You'll never want to eat a salmon fillet without it again!


sockeye salmon


Saturday, July 27, 2013

Summer Lemonade

Is it really almost the end of July?? This summer was the best in Alaska that I've ever had and I don't want it to end! The sun actually came out and the days are hot... Alaska hot, which is like, 79 degrees. But it was still such a nice change from last year and the year before when it rained all summer.
If I could write a clever segway to this lemonade recipe I would. But you get it, summer = lemonade. So there we go. This recipe is awesome and fun to make!

lemonade recipe

Ingredients:
1 and 1/2 cups fresh squeezed lemon juice
1 cup granulated sugar
1 cup hot water
6 cups cold water
1 lemon for garnish

After juicing the lemons and straining out the pulp and seeds, combine 1 cup of hot water with 1 cup of sugar and stir until dissolved. This makes a simple syrup and prevents having grains of sugar at the bottom of the pitcher. Combine 6 cups water with the simple syrup and lemon juice mixture into a pitcher and stir. Slice the lemon into rounds and mix into lemonade for extra prettiness.

lemonade recipe

lemonade recipe

Yum! I hope you make this and enjoy the rest of summer!

Monday, July 22, 2013

Blueberry Chutney

When I was younger I remember my grandmother always making chutney and setting it on the table for every meal. I never really knew what it was and I think I probably didn't like it at that time. About a year ago I decided I wanted to figure out what it was for, what to eat it with and how to make it. I found out it is an Indian condiment that can be made from fruits, berries, onions or even cilantro (which is delicious!!) I made an apricot chutney which tasted amazing... but I haven't made any since!
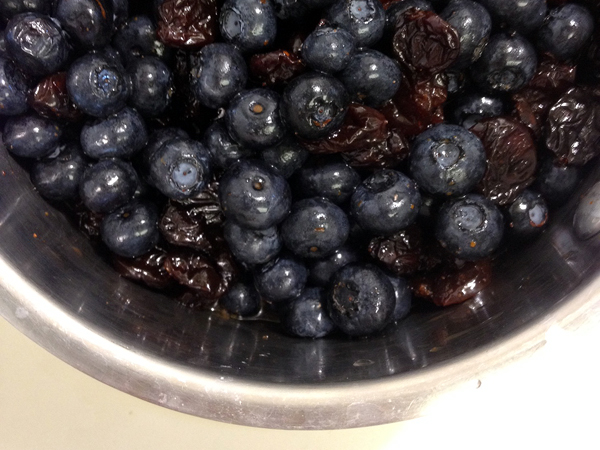
Fast forward to today, when the massive amount of blueberries we bought at the beginning of the week started to go mushy and I knew it was time to use them up. I made (another) batch of blueberry muffins and cooked up some blueberry chutney.

Blueberry chutney recipe


I took the recipe from How to Cook Everything Vegetarian and changed it around a bit to fit what I actually had in my pantry. I'm positive that there are more authentic recipes out there, but this should be a pretty good introduction to chutneys if you have never had any before. It's like a jam with a spicy kick.

Ingredients:
2 Cups fresh blueberries
1/2 Cup dried cherries
1/2 Cup lime juice
1/4 tsp red pepper flakes
1/4 tsp cloves
2 Tbsp brown sugar

Combine everything in a saucepan and turn onto high until it comes to a boil. Reduce the heat to medium and simmer for 15 minutes.

Blueberry chutney recipe

Blueberry chutney recipe

It will end up looking very juicy like this:

Blueberry chutney recipe

Blueberry chutney recipe

The great thing about chutney is that it's easy to make and just a little bit spicy. Joe and I had it on crackers with goat cheese for lunch and then for dinner we had it with a coconut shrimp curry. You can use it on anything from yogurt to ice cream, crepes, cold meats and as a sauce for samosas too.


Wednesday, July 17, 2013

Blueberry Pie

Blueberries are on sale! As you can see we purchased a TON. My husband was so excited he actually wanted to buy 5 pounds of them. I made a dozen blueberry muffins yesterday and they are already gone. This morning we had blueberry crepes and this afternoon I decided it was time for a pie.


I used this recipe from The Joy of Cooking. It turned out very well the last time I made a pie for the Forth of July, so I decided to stick with it.

We still have a whole box of blueberries left! On top of that, in a few weeks there is a Blueberry Festival going on. There is a baking contest and blueberry picking... maybe I should practice a recipe for the contest??


If you like what you just read please click to send a quick vote for me on Top Mommy Blogs- The best mommy blog directory featuring top mom bloggers Related Posts Plugin for WordPress, Blogger...