Showing posts with label decor. Show all posts

Sunday, February 23, 2014

Grizzly Cross Stitch

A few weeks ago, out of nowhere, I decided I wanted to do a cross stitch. Usually this is something I would start and just give up on after a few days since it takes so long to finish... but this time I actually finished it! I bought the pattern from Mother Bee Designs on Craftsy. I suppose the fact that I spent a dollar on the pattern made me more motivated to finish the project. I have a TON of embroidery thread that was left to me by my grandmother and quite a bit that I bought myself, but I don't have many cross stitches to show for it. I also recovered a bunch of stuff from my storage unit in San Diego and found that I acquired quite a few craft supplies, including a bunch of empty picture frames. This one seemed to fit perfectly!

I'm pretty happy to have this cute grizzly bear to hang on the wall! 


Sunday, February 2, 2014

Easy DIY Furniture Update with Contact Paper


I have this awesome mid-century chest of drawers that I got back when I lived in San Diego. It was too beat up to leave it as it was so I used my favorite method of furniture updating, spray paint, to paint it black.


It worked fine but I still wish I could have saved some of that cool wood grain that looks so nice on mid-century furniture. Well, not saved, since it was an ugly shiny plastic woodgrain laminate before, but I wish it had it in the first place to save.


So what is my solution? Contact paper to the rescue! I've wanted to use this woodgrain contact paper since I saw it at the hardware store, but it's a little tricky to find just the right place to use it without being horribly tacky looking (although I guess the whole idea of it in the first place is that it's a little kitschy.) Plus, when I get tired of it I can just peel it off instead of repainting the whole thing. Sweet!


I measured out the shapes that I wanted on each drawer and cut them out carefully. Then I peeled off the backing and placed it on the drawers! Super easy! I think it makes the drawers look a little more interesting instead of just being a big black hunk of furniture sitting there. Try it!


Tuesday, January 28, 2014

DIY Dresser Makeover


I got a bedroom set from a friend when I first moved into our apartment that looked like this:


My friend must have had this set for a long time because I opened up one of the drawers and a baby picture of her fell out! 
Since we have moved I decided I really wanted to get Joe and I a new(ish) set and give this set a makeover for the nursery. There are so many decorating projects and things we have to get done in the new place that I find myself trying to do two things at once, or getting distracted while working on a project and starting on another. I actually painted this dresser green and then put it in Ellie's nursery a couple days ago. I was bringing the drawers for the second dresser out onto the patio and got half of them painted when I decided to bring the first dresser out and do a design on them with painters tape.


Are you getting tired of chevrons too? Yeah! Chevrons are probably taking over the internet! I LOVE my area rug though. It brings the attention away from the boring taupe walls. 
Even though chevrons have gotten a little overused I really think it still looks cute in a babies room. I used painters tape and eyeballed the spacing. I suppose you could measure each stripe if you want it to be exact, but I had no problem making it look even. 


I used an ivory color to go with the green. I felt afterward that the green I picked out was a little too "primary" and I wish I had picked a softer shade. I'm still happy with it though! It will transition well from a nursery to a kids room. I peeled the painters tape off while it was still a little wet and it worked out just fine.


After they were dry I screwed on the new silver handles I picked to replace the gold ones. You have no idea how much I wanted to purchase these adorable handles that were shaped like branches, but $15 a handle is just a little too much for a babies room!


Saturday, January 25, 2014

DIY Kitty Tower - Kitty's 13th Birthday!


Mrs. Peacock turned 13 a few days ago! What an old lady! Since we got a much bigger place to live I thought it would be nice to give her a little spot to hang out and look down on the lowly humans. It would also be a great place for her to feel safe away from a dog, whenever we get one. 

We purchased a couple of floating shelves from Lowes because they looked nice and were wide enough for Kitty to be comfortable. Make sure you look at how much weight the shelves you buy can hold, since you wouldn't want your kitty to fall down. Mrs. Peacock is only 6 pounds and these shelves can hold 12 pounds, so I think they will work out just fine. 


Make sure you put the shelves where there is at least one wall stud to support it. We used drywall brackets for the side that couldn't be drilled into a stud.  

Do a staggered set up so kitty can jump easily to each level! We put two above her kitty tower so she can get pretty high up and one behind the couch because she loves to sit with us.

It's really important that you put something they can dig their claws into so they don't slide off. I used a double thickness of black felt for the tops. My kitty loves fleece but I didn't have any to make pillows out of for her. A good idea is also to use scraps of carpet for scratching or an old bath mat.


Happy Birthday Mrs. Peacock!

Sunday, November 17, 2013

Dresser Set Makeover - The Planning Stage

Wow guys, November is really moving fast! This is a big month for us, getting all our stuff together for the big Road Trip across Canada and the U.S. This coming week I have to continue with a bunch of paperwork, driving all around gathering signatures. This Saturday is the baby shower. We have to organize all our stuff into "bringing with us in the car" and "packing up with the movers." The car needs to be spacious enough so when we leave it parked in a city like San Francisco it won't get broken into, but we also need the essentials like clothes, toiletries, food for the cooler, emergency stuff in case we get stuck in a snowstorm, and stuff to keep the kitty comfortable. We also have to get kitty her papers and a checkup to go over the border. Of course my job is making things more difficult by just now telling me that I NEED a government passport. As if I could get one in less than a week. This is all BS of course. But whatever. The date I leave is the date I leave and they can't stop it!

What I am really excited about lately is the new house we will be getting in Louisiana! I keep looking at the floor plans they have and wondering which one we will get. When we moved into the apartment we have now I didn't have any furniture at all. I actually got everything from my friend who was getting rid of her bedroom set and wanted to get rid of an old love seat too. So that is what we have now, two bed side tables for a TV stand in the living room, a loveseat for the both of us to sit on, a dresser in the living room to hold my military uniforms and sewing stuff and another dresser in the bedroom for clothes. I'm hoping that Joe and I can get a whole new bedroom set once we get to the new place... It might take a while since I really want to find eclectic things from flea markets and thrift stores. I have a storage unit in California with some nice things in it that can start us off, but it won't be enough for both of us.

The main point here is that I want to use our current bedroom set for the nursery. I'm willing to live out of a suitcase while we look for a nice dresser, as long as the nursery is perfect! The problem, of course, is that the bedroom set we have is a little old. It seriously needs a makeover! Good thing I LOVE this kind of stuff!

I have been sitting here looking at these dressers for months now, wondering what I can do with them. The bare bones of the furniture is like, a mid nineties style I think. It's not modern, it's not traditional or transitional. I can't really tell what it is except that it has gold trim (yuk!) New drawer pulls is the first thing that comes to mind. I also want to pull off the gold trim and replace it or find a way to paint over it. Spray paint is a miracle, by the way! I also want to see how easy it would be to put the dressers on little feet instead of just being flat on the ground.


But what about the inspiration? I've been searching for some ideas and here are a few that look feasible with the design of my current pieces. It's a shame how many photos you see on pinterest of perfectly awesome looking furniture, mid century modern style, that are then destroyed with weird paint jobs! I swear half the "makeover" pins I looked at had the "before" peice looking much better than the "after."

IMG_0035

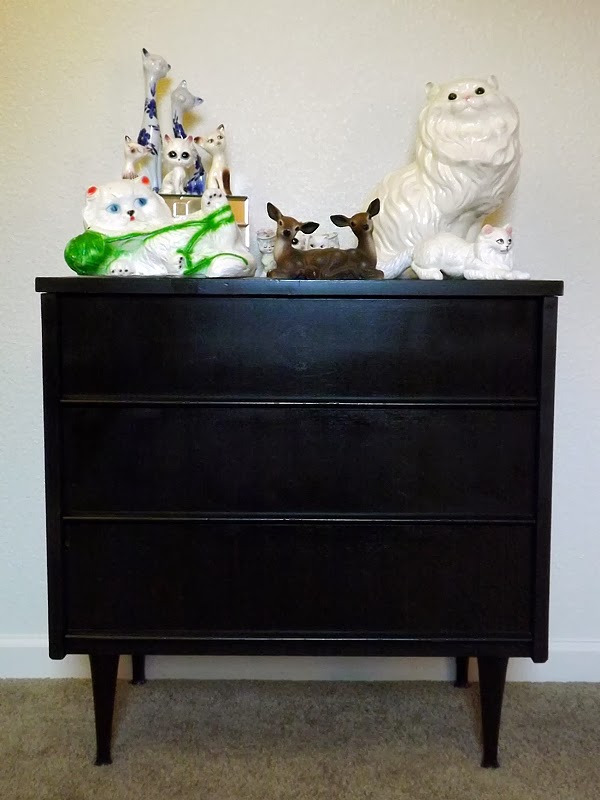
Mid-Century Dresser from Dream Green DIY. Weird paint job, yes, but it actually looks really cool combined with the wood stain she used. 


Ikea Dresser Makeover from The DIY Homegirl. This paint job is simple and still looks retro!


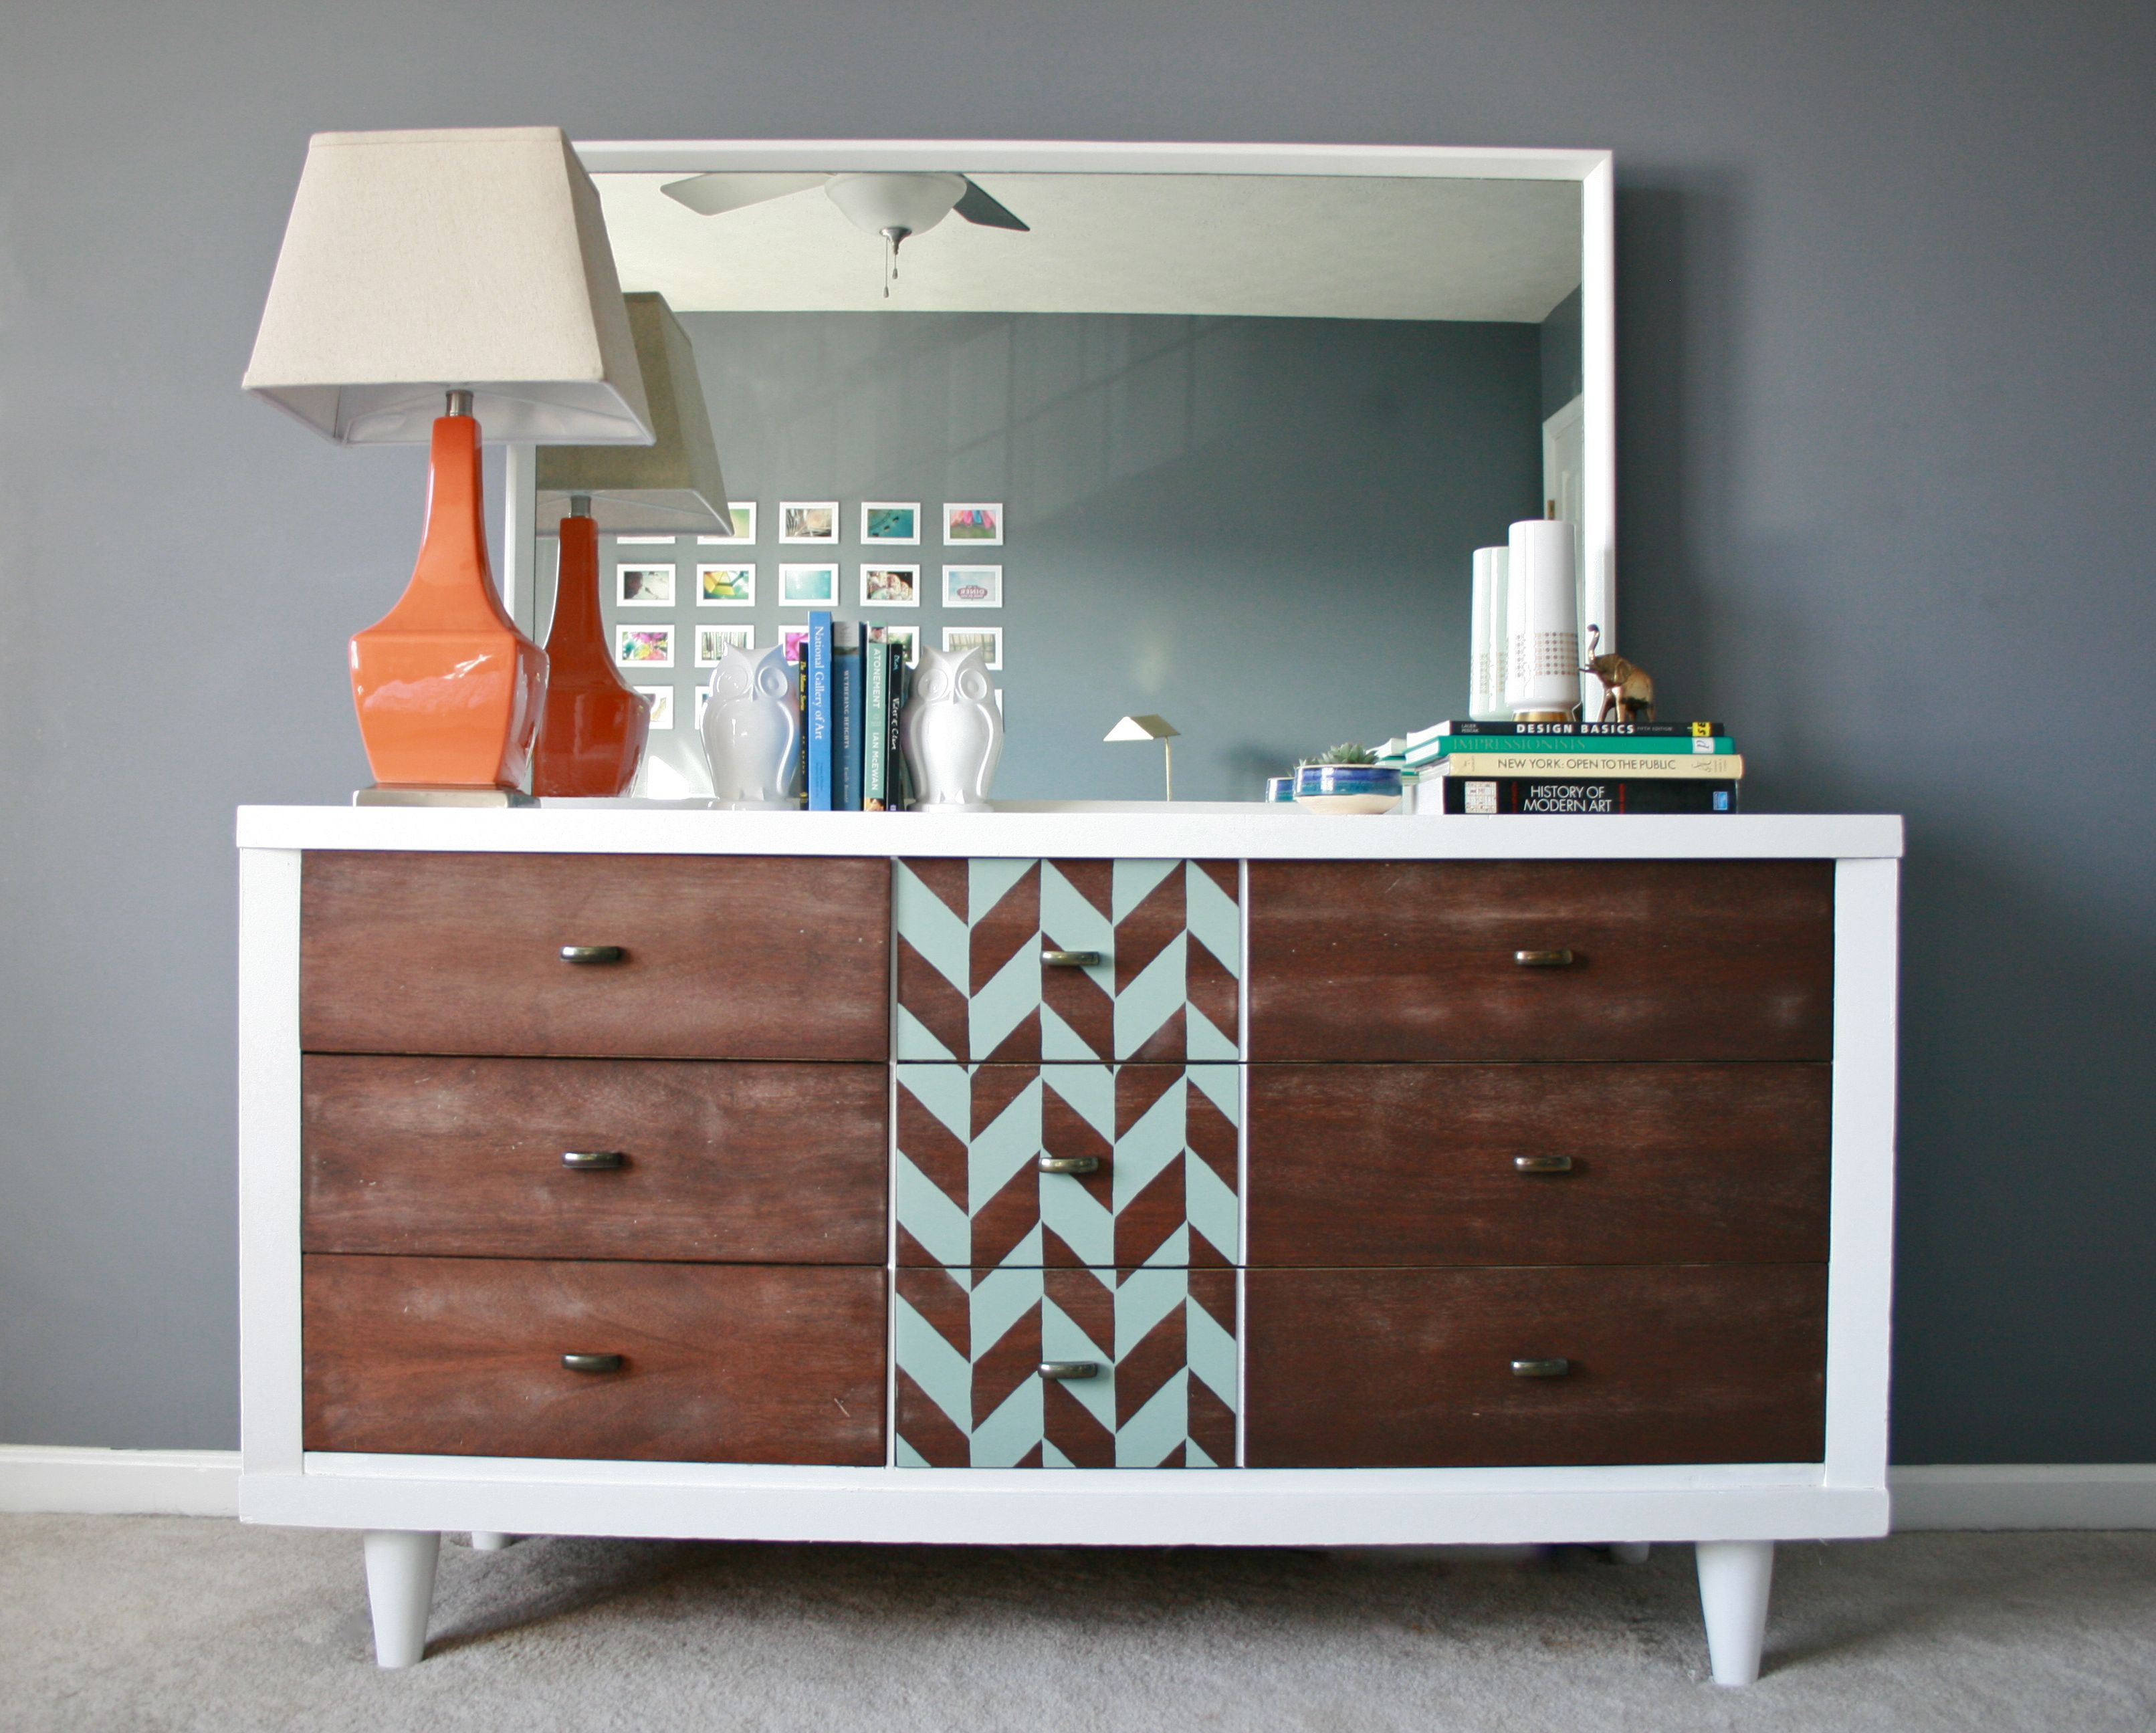
Ikea Tarva Hack from Persia Lou. She was inspired also by the mid century dresser I posted above. Again, I love the idea of incorporating wood grain in the design. 

I'm trying to refrain from taking a trip to Home Depot! I don't think it would be a good idea to start up a big project like this right before a big move, but hopefully I can get it done once we finally get settled into our new place.

Tuesday, September 24, 2013

Local Spots - Ozarks Antiques and Decor

Tuesday, September 24: Review a book, place, or product

We randomly stopped into Ozarks, an antique store in Anchorage. If you love the Anthropologie store, well, this place basically IS the Anthropologie store. High prices and all. But it look gorgeous inside and has the most gorgeous things. Every corner has little vintage baubles and sweet smelling things. My favorite find was the little macaron shaped trinket boxes. This store makes me wish I had a big house to decorate!


Tuesday, August 6, 2013

The Sweet List - Vintage Vanity Table

Is there anything more fun than taking a Saturday evening to pamper yourself? I know when I've had a hard week at work I like to come home, take a bubble bath with a glass of wine in hand (or champagne if I really want to do it Marilyn Monroe style) and have some jazz playing in the background. This is usually followed by being wrapped up in a robe and putting on face cream, pin curling my hair and sometimes doing my makeup for that night if I plan to go out. Nights like that deserve a fancy dressing table, which I don't currently have. I found a couple of vintage jewelry boxes that match each other for my dressing table (if you can call it that) but I still lack a larger box for the bulk of my jewelry and I would love a cute place to store my makeup brushes!
I remember being a kid and having adorable little mirrors and perfume bottles that were so fancy. I always thought I would have a pretty vanity filled with makeup and jewelry when I got older. I guess it's something to look forward to doing once we get a bigger house with some real furniture!

Here are my picks for my dream vanity table:


Tuesday, June 18, 2013

Kitschy Kitties Part Three

I found one more silly cat this weekend. I actually found a ton of cool things at one shop last Saturday. When I walked in I immediately picked up 6 things I HAD to have! I've been scouting out 70's style kitschy things ever since I realized that our color theme was pea green and orange (it just kinda happened that way.) 


I found a handmade flower embroidery which I love...


...and this mushroom wall clock! Holy moley! My husband didn't like it, but I told him I could not just leave it behind. Since I cleaned it up and hung it on the wall he changed his mind about it and thought it was pretty cool.


On top of that, I found some sweet mushroom ceramic tiles.


I seriously need a better camera!

Saturday, February 23, 2013

Samurai

I got my tax return back so naturally I went out on a little shopping spree for the apartment. There were a few things the bathroom needed, like a shower curtain and extra storage. The living room needed bar stools for the breakfast nook and I picked up a nice ladder shelf from Target. I even splurged on an espresso machine! But best of all I got to hang my Samurai curtian I found in Wasilla at the thrift shop. It probably came from a sushi restaurant... I love it!!


Monday, February 18, 2013

More Wall Art


Here are some more paintings I've been doing for our new place. I've had these oddly shaped canvases for a really long time but I never knew what to do with them. Having a new apartment has really helped with my insipration! I've been working on painting and decorating all weekend and I finally feel like these canvases are finished! The photos aren't turning out as well as I thought, I think it's because there are no windows in the living room and I often stay up late at night working on them.


The first one is a silhouette of the Empire State Building. Our first place may be in Alaska, but our home is New York (...upstate... but that's not the point!) I painted the canvas black and cut out a paper silhouette. I taped it to the canvas and painted white around it.


The second one took a few tries before I got it right. I did a simple arrow pattern with grey and lime green.


I love the thick gallery style canvases because you can paint things on the edges of the canvas.


Pinterest Party

Chevron Painting


I've been working on a bunch of decor projects over the weekend, the biggest being this chevron painting. It took longer than I expected, mostly because the paint I was using was cheap.


I cut a stencil out of paper and traced it over the whole canvas. Painting straight lines can be tricky! As long as you do the best you can you really can't tell if the lines aren't perfectly straight.


I had to do a couple layers of paint to make it look smooth and then a coat of satin finish Mod Podge to get rid of the cheap matte look.


I was really unsure about the colors at first, either the brown and green looked too drab or the blue was too bright, but I painted some black stripes in which balanced the whole thing out pretty well. Do you like my pillows? I found them at Target on clearance! The colors and the little owl are perfect for the room and match my owl paintings I already have. I actually might hold off on getting a new sofa. I was convinced this love seat wasn't going to work with the decor I was looking for. It goes to show you that you can do anything with a little color and accessories. 


Pinterest Party
If you like what you just read please click to send a quick vote for me on Top Mommy Blogs- The best mommy blog directory featuring top mom bloggers Related Posts Plugin for WordPress, Blogger...